If your dogs are anything like the four I have at home, the moment you put them in a shirt or a Halloween costume, they freeze. And even the tastiest treat can’t distract them from how much they hate wearing clothes. I’ve never been too big on dressing up my animals, but there’s no denying how cute some pups look with a little extra style. I was thinking about what I could possibly throw on one of these adorable little guys for a special event and I immediately thought of bow ties- not so different from a collar, but definitely much cuter.
After doing some referencing research, I found a post by Maison Kuotidien on how to make one of these little guys and really liked the simplicity of the whole thing so I thought I’d give it a shot. I changed just a couple things and adjusted the size of course, as this was being made for my small 5-6 pound chihuahua poodle mix, Klaus.
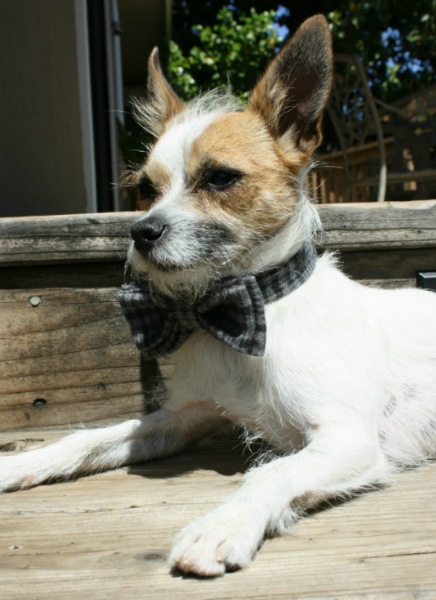
What a little flirt…
So with some extra materials I found around the house, I started on this adorable accessory. In total, it probably took me about an hour or a little less. I should note that I made a few of these bow ties and found that using flannel fabric worked the best rather than a woven kind of fabric I experimented with the first time around. It may take some trial and error, but you’ll find what style you (and your pup) like best.
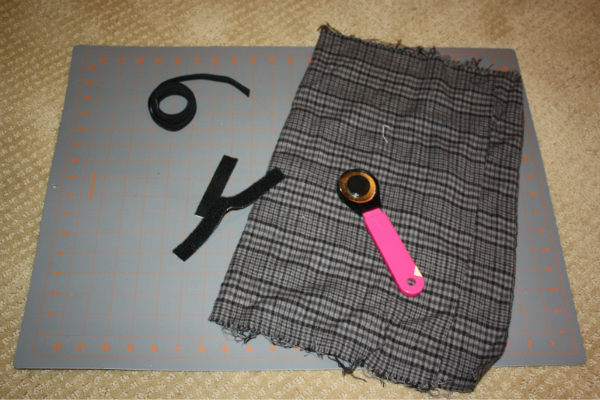
Here’s What You’ll Need:
– hot glue gun
– extra fabric
– elastic band
– velcro strips (relatively small pieces)
– fabric cutter and/or quilting ruler * (this isn’t necessary but I find I have more accuracy when using these tools instead of just scissors)
And one of these of course..
After you have these tools out and ready, cut two pieces of your fabric 8″ x 3 1/2″ each. If your dog is more medium sized I would add an extra inch to each side.
With one of the pieces, fold each long edge in so that they meet in the middle. Dab a little bit of hot glue to keep them together.
Next, take the short edges and bring those to meet in the center. Dab a little more glue.
Next, you’re going to essentially do the same thing to the other piece of fabric but make it just a bit smaller. Instead of having my edges meet in the center, I did a modified ‘thirds fold’ to adjust the size. Dab with hot glue as you go.
You want the width to be a little smaller than your first piece as well so you can bring the edge a bit past the center meeting point to adjust the size.
Next, you’re going to flip the pieces over so you can’t see the backside that is glued and place the smaller piece on top of the larger piece. Use a little bit of hot glue to keep the pieces together. Then pinch the top piece so that it meets in the middle, giving you that bow tie shape.
Use your hot glue to make the piece stay pinched and then do the same to the bottom piece. Don’t worry about it being perfect at this point, as you can see mine most certainly is not, because you’ll be adding the piece of material in the middle next that covers this part up.
Next, you’re going to make the middle section that covers up the pinched material. Cut a piece of your scrap material 2″ x 3 1/2″. I ended up trimming a bit of it off afterward but it’s always better to have a little extra rather than not having too much. Fold the long edges into thirds or until you have the perfect width you want. Glue each edge to make sure it is secure. We’re going to be securing the neck band inside of this center piece so don’t glue it all on just yet.
Next, make sure you’ve measured your dog’s neck or even their collar just to be precise as to how large to make the band. My little pup’s neck was about 10 inches around so I added 2 extra inches and cut a 12″ x 2″ piece of fabric. This is where you’ll be using your elastic band also so make sure that it’s about the width you want your neck band to be. Cut it 1 inch shorter than the length of your fabric so that you can fold in the rough edges at the end. I cut an 11 inch piece of elastic.
Then fold up the bottom edge to clean it up and create a smoother line (a little tough to see because of the busy fabric).
Glue the edge of your material to the edge of your elastic, leaving room for you to still be able to fold it over into thirds and fully cover the elastic piece.
Fold it into thirds, gluing as you go until the elastic band is fully covered. Fold in the extra bits of fabric on the end and glue to create a clean and closed up edge.
After the band is done, decide where you would like it place on the backside and glue the band directly to the bow tie. Then finish up your center piece by pulling it all the way around, including the neck band piece as well and gluing. This is where you may need to trim a bit off. Cut your velcro pieces to size if necessary and glue each piece on to the edge of the band.
Your bow tie is finished!
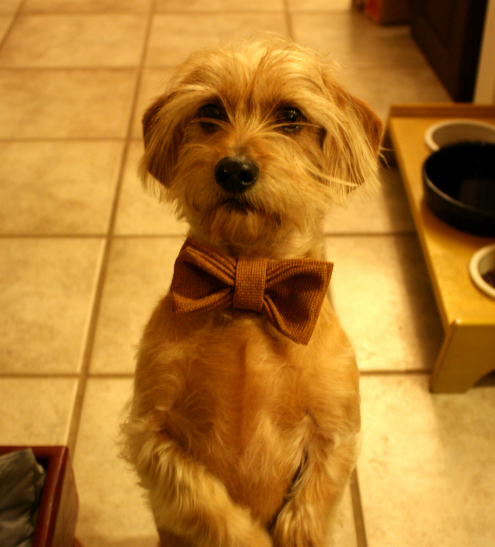
Next, put your finished bow tie on your adorable pet and shower them with love and affection as usual. Klaus is the little guy around the house so I’ll need to make a few more for the other boys before they get too jealous. Frankie is modeling my prototype down below.
Good luck with your doggy bow ties! I’m sure your pooch is going to love it.
Happy crafting!


That is amazingly adorable! I love bowties, and this is the perfect way to do it! Though I still have dreams of having a loveable scottie dog that I can put a little plaid jacket on, this will do me wonders in the intermission. 🙂
Thank you! Ooh, I’m a sucker for scotties too.. or any dog for that matter. 🙂
Cute dapper pups! Your bow ties turned out better than mine! 🙂
Hey thanks! I loved your bow ties! Thank you for the inspiration :^)